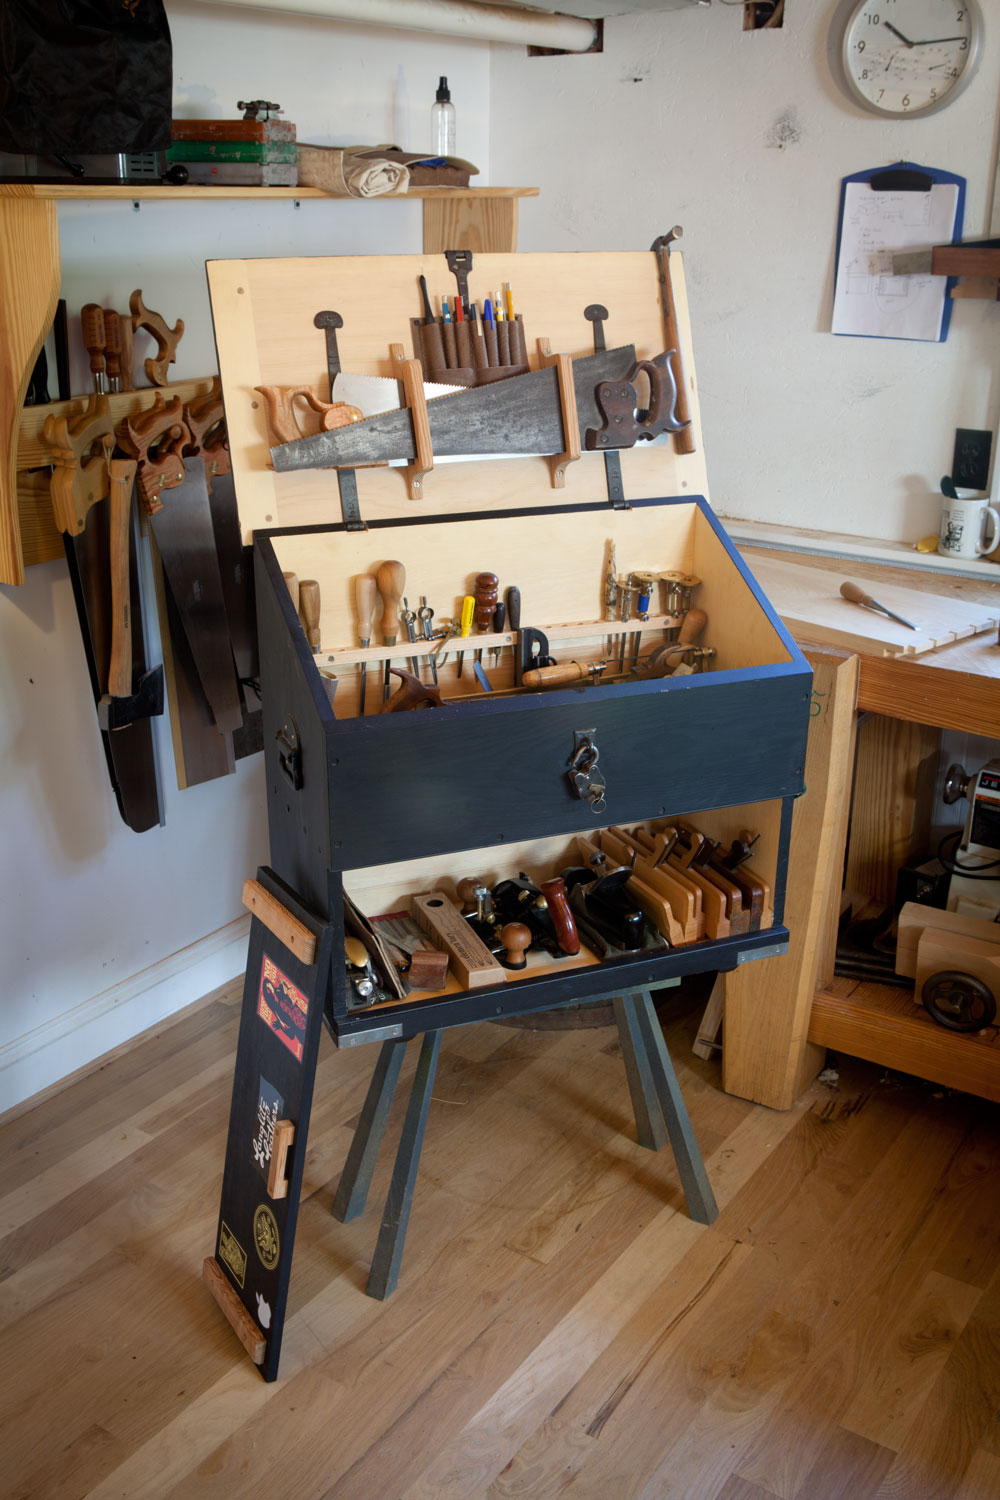
Christopher Schwarz is a big fan of tool chests. He’s such a big fan, he built a single chest, and then sold off all his tools that didn’t fit in the box and wrote a book about it. I certainly admire the discipline involved. He now makes all his furniture by hand using preindustrial tools. I only recently discovered him, but he’s apparently somewhat well known in the woodworking circles.
Tag Archives: make
DIY Electric Lifting Desk
“Loren” (no last name given) of Canada designed and built his own electric lift standing desk, with integrated computer. I do like this. He’s mostly managed to create a desk that I like, while at the same time doing some tricks that I normally think are cringeworthy.
It’s a corner desk, which I don’t tend to like because of they’re inflexible layout, but I do appreciate how they maximize of surface area that’s in reach. It has a glass top, which always seems a bit cold (both physically and aesthetically), to reveal an embedded computer. I’m kind of torn about the embedded computer. Part of me thinks that it’s a bit too gamery, yet I do like how it frees up floor space, and it does simplify the cable runs when raising and lower the desk. Even with all these touches that I don’t really like, the top does look nice. It’s the the legs that I can’t stand.
The legs are very amateurish. He’s using very thin (what half inch, if that?) single board trestle style legs. They’re absolutely horrible. They are literally two boards nailed together in the shape of a tee. The desk just doesn’t look stable. He’s added some simple boards for mounting some linear actuators, but the mechanisms are still exposed on the other three sides. The legs are really a disappointment.
The real find for the desk are the linear actuator arms. HARL-3616+ arms from SuperPowerJack. 18 inch extension and can lift 500 pounds on 36 volts. The real feature is that he could find them on eBay for $50 to $100. They don’t have limit switches though, but those are simple to wire up.
Still, an electric lifting standing desk for mere hundreds of dollars instead of several thousand is a huge win!
Throwie Lights
Nothing like tape, an LED, and a coin cell, and an Orangina bottle to impress your wife.
BarBot
I’ve been strongly considering making a barbot (a.k.a. a drinkbot), even thought don’t usually drink at home. I haven’t given much thought to its cosmetics, instead I’ve been focusing on mechanics of the bot. I figure, the mechanics will dictate the form, and if one sprinkles enough LEDs on it, can look look fine.
Space Mobile!
Shortly after Maximilian was born, I decided that he should get a mobile to place over his crib. I knew what theme I wanted. I wanted a space mobile. I looked all over, but couldn’t find any in stores, and I sure as hell wasn’t going to spend 90 bucks on one from Etsy, so I decided to make one myself. Normally, these things are made out felt, but not having a sewing machine, decided make Maximilian’s out of paper.
In Self Indulgent / Cliched Meme News…
Nitinol and Origami
Electronic Origami Flapping Crane w/ tutorial from Jie Qi on Vimeo.
Jie Qi at the High-Low Tech lab at MIT’s Media Lab, posted a HOWTO on nitinol and origami. In the HOWTO she mentions that you can’t solder the nitinol directly, and so you’ll have to have create a soldering pad for it. (She used a craft crimp bead.) Another tip she gives is the need to preheat the nitinol by running a 9 volt charge through it for five seconds. When the wire relaxes, it will become be longer than it was originally, and so you’ll need to retention the wire. Last of all, she warns against keeping the wire energized too long, lest your “burn out” the nitinol. In another project, Qi mentions she used 0.006 inch flexinol for the origami, but used 0.01 inch for the more rapid vine/snake project.
I have had a fairly long interest in synthetic plants and was thinking if nitinol could be used to in a heliostat or some sort of dinural deployable structure, but I never knew the reaction time of nitinol. Seeing it used understanding what voltages are required was helpful. (Poking around just now, I also ended up finding a handy nitinol wire width-voltage-time-force table.) While I doubt that I will ever actually build whatever vague idea idea I have for synthetic plant, I’ve come to conclusion that nitinol perhaps isn’t the best choice of materials if you want it to hold position for any considerable length of time (or at least not without some sort of mechanical latching).
Raspberry Pi
Raspberry Pi aims to be an ultra low cost single board computer for education. While it’s still in preproduction, it cost about $25 and come with 700 Mhz ARM 11 chip with 256 MB of ram, a USB 2.0 port, HDMI with 1080p30 H.264 decompression, an SD slot, ethernet, and general I/O lines, running Linux, and packaged on a board the size of a credit card.
It’s a very interesting platform. I could see replacing my dad’s MiniITX based weather station with one, or perhaps using it for a some other homebrew system.
Of course, this isn’t the only tiny Linux system out there. Gumstix was the first I heard of, and was the platform of choice for bluetooth sniper rifle. Then there was the wall warts, like the SheevaPlug and the GuruPlug, it’s kind of hard to figure out where to actually order those, whether they’re worth the $99. The closest thing to the RaspberryPi, is Texas Instrument and DigiKey’s BeagleBoard. The BeagleBoard is here today, and is a bit beefier with a 1+ GHz ARM chip, but also much more expensive ($89 for the BeagleBone, $135 for the latest board.) Personally, I wouldn’t pay $100 for an embedded system for just hacking around on. If I was more into hardware development and had an application I knew needed the extra speed, them sure maybe, but I just can’t think of any that I would want to make right now.
Thanks Mike!
LED Lanterns
The solar power and auto-on features of the Kimono Lantern reminded me pummpers and and SolarRobotic’s PumLantern, but much less spastic. (See video after the jump.)
The PumLantern’s case is clearly inspired by Japanese tatami lamps, but with stencils to break up the light. I recently saw another lamp that did something similar. I can’t say I approve of the choice of stencils, but I do like the idea of shapes covering the individual panels of the lamp.
Kimono Lantern
The folks at TokyoHackerSpace, have taken a break from building geiger counters, and built this rather cute table lamp. According to the write up, this solar powered automatic light was originally intended for tables at a local restaurant.
TokyoHakerSpace’s Kimono Lamp looks a lot like a DIY version of the €35 Marmaled / Jelly Lamp from Semiki, but more technically advanced. (The Marmaled uses a tilt switch and two AAA batteries.) Really, when it comes down to it, the Marmaled’s jar and black label is what sets it apart. Of course, you can always buy jars wholesale
Video of the Kimono Lamp in action after the jump.